So far on our journey, we have covered the basics of monday and its capabilities, but as promised in our first blog “Welcome to monday.com’s Limitless World”, we are going to challenge you to think outside monday’s native capabilities. Whether you’re a business owner looking to streamline operations or an individual seeking to simplify daily tasks, creating automations can make your life significantly easier.
One powerful tool that can help you achieve this with our partners at Make.com. In this blog post, we’ll walk you through the process of creating an automation using Make.com, from the setup to the final execution.
What is Make.com?
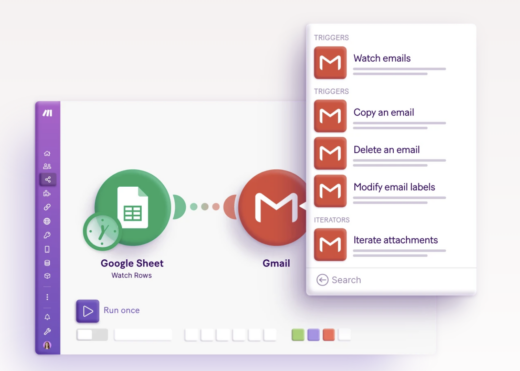
Make.com is an automation platform that allows you to create custom workflows and integrate various apps and services to automate repetitive tasks. With its user-friendly interface and a wide range of pre-built templates, Make.com makes it easy for both beginners and advanced users to create automations tailored to their specific needs. Essentially, it uses a gooey interface, that allows you to visually create your automation recipe, and host it before importing it back into monday.

As we discussed in the previous blog “Automate X Anything” there are two types of automations, the first on is a monday-to-monday automation, while and Integration is an automation that connects with a 3rd party platform. It’s important to distinguish between the two, because integrating with a 3rd party will require more development in the overall process, as well as ensuring, that they have an open API.
When creating automations with make keep these best practices in mind:
- Start Small: Begin with simple automations and gradually add complexity as you become more familiar with the platform.
- Open API’s: If you are integrating with a platform, you will need to check the platform specifications to ensure they have an open API. Or you can reach out for their developer tools package.
- Document Your Workflows: Documenting your automation workflows can be invaluable for troubleshooting and future reference.
- Security and Privacy: Be mindful of data security and privacy concerns when automating tasks that involve sensitive information.
- Regular Updates: Apps and services may change over time. Regularly review and update your automations to ensure they remain effective.
- User Support: Make offers user support and a community forum where you can seek help and share knowledge with other users.
- Explore Templates: Before diving into creating your automation from scratch, it’s a good idea to explore the available templates. Make provides a library of pre-built templates for common tasks like email marketing, data synchronization, and social media posting. You can use these templates as a starting point for your automation.
We strongly suggest you start by mapping out your automation, by taking the time to define the triggers, and the actions, this will help you when creating your gooey and its conditions.
Building Your Automation
Now, let’s create a custom automation from scratch:
- Create a New Automation: Click on the “Create New Automation” button to start a new project.
- Choose a Trigger: Every automation begins with a trigger, which is an event or condition that initiates the workflow. Select a trigger that suits your needs. For example, if you want to automate email responses, you might choose the “New Email Received” trigger.
- Configure the Trigger: Depending on your chosen trigger, you’ll need to configure its settings. This could involve connecting your email account, specifying filter criteria, or setting up a schedule.
- Add Actions: After the trigger, you’ll add actions to define what happens when the trigger condition is met. These actions can include sending emails, creating tasks, updating spreadsheets, and more.
- Connect Apps and Services: Make allows you to connect various apps and services to your automation. Use the platform’s integrations to link the tools you need for your workflow.
- Set Up Conditions and Branching: You can add conditions to your automation to create branching logic. This allows your automation to adapt to different scenarios and perform different actions based on specific conditions.
- Test Your Automation: Before deploying your automation, it’s essential to test it thoroughly to ensure that it works as expected. Make provides testing and debugging tools to help you identify and fix any issues.
- Deploy Your Automation: Once you’re satisfied with your automation, deploy it. Depending on your plan, you may have options for scheduling when it runs or triggering it manually.
- Monitor and Optimize: After deployment, regularly monitor your automation’s performance. Make.com provides analytics and logs to help you track the execution of your workflows. Use this data to identify areas for improvement and optimization.
There you have it, how you can Automate X Anything using monday.com and Make.com! By following the steps outlined in this blog series and adhering to best practices, you can ensure a successful start in your monday journey.
Join us on December 7th 2023 for a live make.com webinar. Register here.
What if you do not have time to build out your boards or maybe you just need some additional support?
Next Up: In our next blog, we’ll discuss the cost benefits of DIY vs. Hiring a monday Partner like AXANEXA. Click here to learn more.
Join us on December 7th 2023 for a live make.com webinar. Register here.
Don’t forget to follow us on LinkedIn for tips and tricks to enhance your monday experience!
Not on monday.com? We would love to invite you to a free trial- Click here to get started today!
Just want help? Talk to an expert, Click here to schedule a consultation today.

About the author:
Carrie Fifield from the AXANEXA Business Development team, a passionate monday.com enthusiast eager to explore new use cases and take on challenges. Connect with Carrie at cfifield@axanexa.com to unlock the full potential of monday.com for your business!
Partners:


